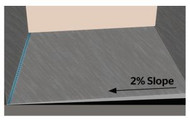
Even a slight 2% slope can cause a trip hazard in a shower. Slope the bed toward or away from the door instead.
Linear shower drains have been attracting attention in shower and bathroom design of late for their low profile and design flexibility. But with new products come new installation practices. Jim Van Landingham, vice president of residential sales for Quick Drain USA, shares some important tips to remember, and mistakes to avoid with this product category.
1. Simplified slope. Traditional center drains require the tricky task of sloping the mud bed in four directions. “If you’re not careful, you can end up with a flat area, which can require the contractor to call the installer back out to re-do it,” Van Landingham says. Linear drains only require a single slope in one direction for easier installation.
2. Appropriate placement. In cases of curbless (no-threshold) showers, place linear drains along the shower door wall or the wall directly opposite that. Because of the slope requirements, placing the drain perpendicular to the door creates a lip and a trip hazard. “A building inspector will red-flag that,” Van Landingham says.
3. Length considerations. Manufacturers offer linear drains in several lengths, which is an important point to consider during design. “For curbless, we recommend placing the drain either across the whole entrance wall—not just the doorway—or across the whole wall opposite the entrance,” Van Landingham says. A drain that’s too narrow, or one that only spans the doorway, will cause water to pool or flood beside walls and in corners.
4. Flow rates. For the most part, linear drains can remove 8 to 10 gallons of water per minute, so designers should not exceed that volume in their shower designs. This shouldn’t be an issue for designers using lower-flow showerheads; however, luxury showers with multiple heads and sprays could come up against water volume issues.
